

Copyright © 1997, Regents of the University of California
Tour documents are divided into sections that are numbered and given descriptive headings. Demonstration instructions appear in tables which have two or three columns per row:
| ToXX |
A brief description of the concept being taught goes
here, as well as instructions about what to look for on the screen.
An instruction (e.g., click the foo button) goes here. A description of the screen which results from your following the instruction goes here. |
 |
DataSplash only uses the left (primary) mouse button, hereafter referred to as the "mouse button." The following definitions are used throughout the tours:
![]()
With the exception of the Canvas Tour, you may begin any tour by loading a pre-constructed canvas. You can either start with a canvas which we supply, or you can start with a canvas which you have created by following previous tours.
In your UNIX environment, do the following:
| Ge01 | Establish a database client connection.
setenv PGHOST <database server> |
| Ge02 | Run the DataSplash binary (usually just datasplash)
with no options.
datasplash The main menu for DataSplash should now appear in the upper left corner of your monitor. |
Further actions are performed in the DataSplash environment. DataSplash uses POSTGRES95 as its database management system. In POSTGRES95, data tables and visualizations are grouped together in "databases" (you can think of these as directories). When you start DataSplash, you must first select a database. Then you can select a visualization within that database.
| Ge03 |
The Open Canvas button is the second button from the left on
the main menu.
Click the Open Canvas button on the main menu. If you have not yet selected a database (for example, if you have just started running DataSplash), you should now see the Open Database dialog. If you have already selected a database (perhaps for a previous visualization, the Open Canvas dialog will appear. Go to step Ge05). If you see a dialog with the message, "Database Connection Error" then you probably don't have your PGHOST environment variable set correctly. |
| Ge04 | Select a database to use.
Select the "datasplash_demo" database and click the OK button. You should now see the Open Canvas dialog. |
| Ge05 | Select an existing DataSplash canvas.
Either select canvas_<login><date> name or select one of the following demo canvas names: Layer Tour: layer_demo Click the OK button. Depending on your database server, there may be a considerable delay. Eventually you should see a window with the canvas name appearing as the title of the window. |
When you open a canvas you are given a new window, a studio window. You use several components of this studio to edit or navigate in a visualization.
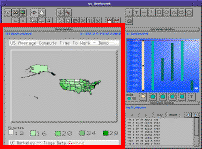 |
Canvas: The canvas displays the current visualization. You can pan and zoom in the canvas, as well as create and edit objects in the canvas. The canvas is the large square area on the left side of the studio. |
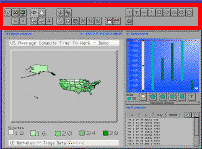 |
Toolbar: The toolbar contains icon buttons which you can use to edit objects and navigate in the canvas. The toolbar icons occupy two rows at the top of the studio. Most of the tools in the toolbar represent the current mode of the studio (e.g., you can be in pan mode). The mode defines the way that mouse actions in the canvas and layer manager are interpreted. |
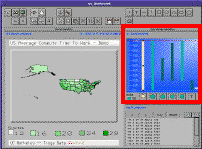 |
Layer Manager: The layer manager lets you graphically program different layers in the canvas. The layer manager occupies a sky blue square area in the upper right of the studio. |
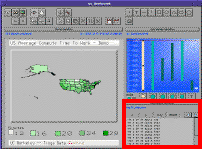 |
Data Manager: The data manager displays the current data set or table. It occupies a grey square area in the lower right of the studio. |
![]()
At this point you may want to save the demo canvas as a different name. That way, you can work on the new copy of the demo canvas and keep the original demo canvas for future use. In this section you will copy a canvas by using Save As mode to save a copy under a new name.
| Ge06 |
Save As mode. In this step, you put the studio into Save
As mode.The Save As button is located in the second row of the
toolbar in the upper left corner of the studio. The button icon is a floppy
disk with the word "As" on it.
Click the Save As button on the toolbar. The Save As button should now be depressed, the layer bars in the layer manager should be darkened and the canvas should be rendered as wireframe. Mouse actions in the canvas and layer manager will now be interpreted for Save As mode. |
| Ge07 |
Bring up the Save As Canvas dialog. You invoke this dialog using
a button above the canvas that spans the entire width of the canvas.
Click on the wide Save Canvas button. You should now see the Canvas Save As dialog that contains a text box for entering a new canvas name. |
| Ge08 | Enter your working canvas name.
Fill in a name in the text box (you could use canvas_<login><date>, e.g. "canvas_mts0109") for your working canvas and click the OK button. The studio window title should now display the new name you entered. All your changes will now be saved to this new canvas name. From now on, we will refer to this name as canvas_<login><date>. |
| Ge09 |
Leave Save As mode. You can leave this mode by selecting any
other mode. If you do not yet know which mode you would like to be in,
we suggest Click Pan. The Click Pan toolbar button has a
white arrow pointing upward to the left in addition to a white cross.
Click the Click Pan button on the toolbar. The Click Pan button should now be depressed. Now you can pan in your visualization. |
To stop at any point in a tour, save your working canvas using the following instructions and exit DataSplash (see the Section 6).
| Ge10 |
Enter Save mode. Before you do this, you may want to verify
you are not modifying one of the demo canvases. (If so, see
Section 4 to save your work
in a new canvas rather than overwriting the demo canvas).
The Save button is located in the upper left corner of the studio. The button icon is a floppy disk with no writing on it. Click the Save button on the toobar. The Save button should now be depressed. Any component of DataSplash which has been modified will be a bright pink color. |
| Ge11 |
Save all changes using the button bar above the canvas that spans the
entire width of the canvas. (Note, this is the same button you used in
Save As mode, but pressing this button in Save mode does
not bring up a dialog. Pressing the button bar immediately
saves all your changes.)
Click on the wide Save Everything button bar. Depending on your database connection, this may take a few seconds. As components are saved, they will change from bright pink to dark burgundy. |
| Ge09 |
Change the studio mode from Save As to Click Pan.
Click the Click Pan button on the toolbar. The Click Pan button should now be depressed. |
You may now proceed to the next section to close your studio window and exit DataSplash. If you are stopping part way through a tour, you may want to note the step number at which you will resume.
You now want to close the studio window and exit DataSplash safely.
| Ge10 |
Close the studio window. The Close Studio button
is on the right edge of the toolbar.
Click the Close Studio button on the toolbar. If a dialog appears asking if you are sure you want to close this window, click the Yes button to discard your changes. Otherwise click the No button and proceed to Section 6. The studio window should disappear. |
|
| Ge11 | Exit DataSplash.
Pull down the File menu from the main menu and select "Exit". The DataSplash Main toolbar should disppear. |
|